Application system | Improve your staff applications
Normal staff applications are boring and you want to find new ways to improve them? Well, this is the moment, when Discortics™️ comes to help you, with Discortics™️ Applications System.
Maybe, I will start by telling more about it.
Discortics™️ Applications System is a system, where you can add open/closed questions and let users answer them, without any public channel or google form.
All questions are asked in the user's DMs and answers can be sent to the channel, that you selected as Applications Logs(I will tell you about it more later).
Let's get started with the configuration process
Configuration process could be made using Discortics™ Dashboard. If you are making it by it make sure to log in with your discord account.
After logging, select your server. Then, you should be redirected to your server panel. Select applications, in the menu, on the right side of the site.
That's what you should see:
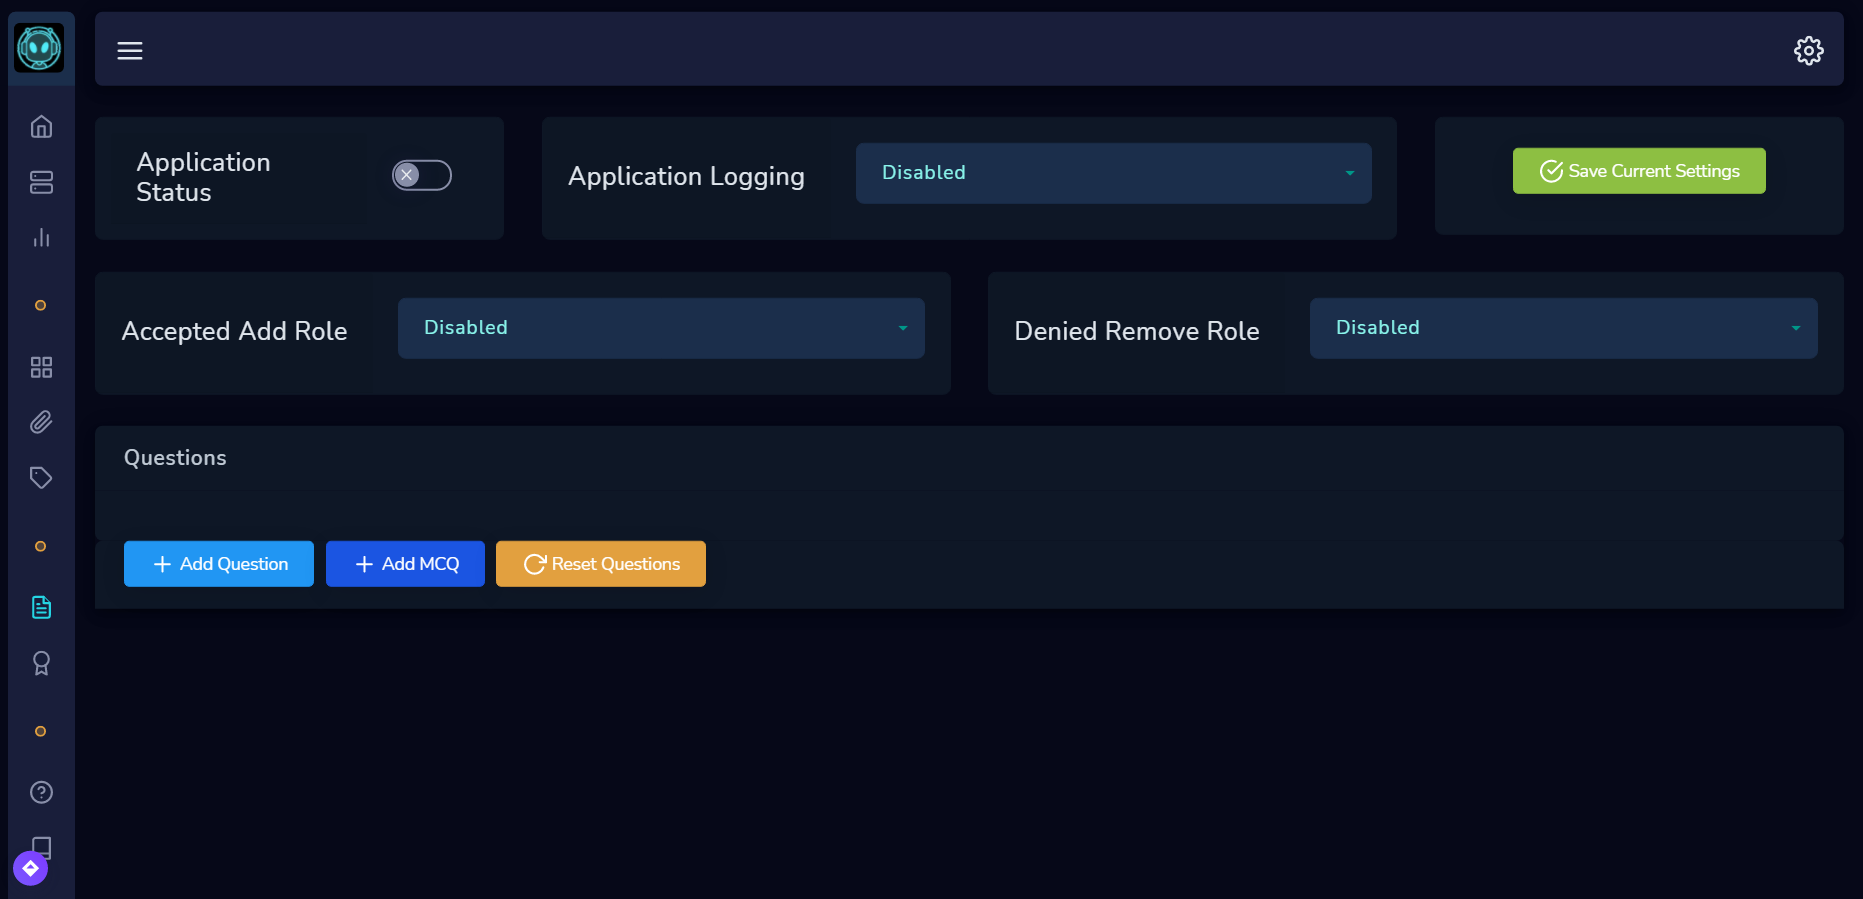
Now, we can start setting up the applications system in one of the methods.
- Adding questions
First of all, let's add some questions to the application form.
There are 2 types of questions:
• Normal questions(Write)
• MCQ - Multi choose questions(Choose - Reactions based)
You can have up to 50 questions.
- Normal questions
Normal questions are open questions, which need answers from users. For example, What's your name? or Why do you want to join the server´s staff team?
To add one, click + Add Question button. Then, type your question in the textbox.
This should look like, where Question 1 is your question:

- MCQ - Multi Choose Question
MCQ are questions, where users need to select one option from options added by the application creator. For example, Did you added Discortics to your server? the answers: Yes, No, or I will do that now and the user can select one from these.
To add one, click+Add MCQ button. Then, your question in the textbox.

This time, you can see Options button. After clicking it, you will see this menu:
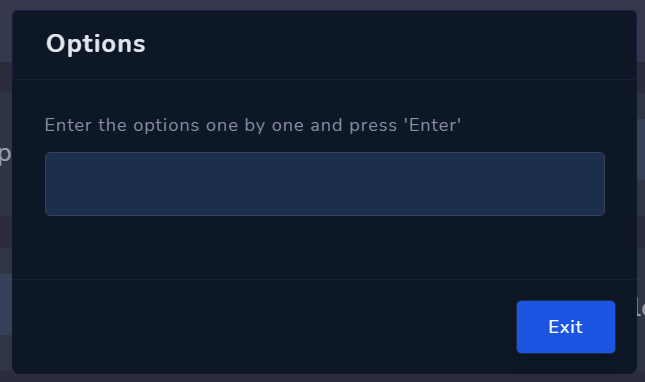
To add options, that user can choose, just type your option, for example, Yes, and click Enter. You can add up to 9 different options in one question.
2. Opening closing applications
If you added some questions and want to let users start applying, open applications. There are 2 ways to do this.
- Using dashboard
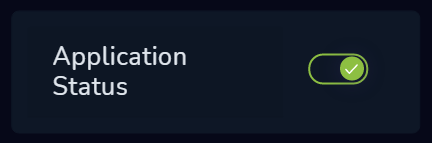
To open/close applications using Dashboard, simply toggle the Application Status switch. If it's green, they are open, if grey - closed.
- Using commands
Opening applications through commands is very easy. To open it, useapp-status openand to close -app-status closed.
Congratulations, you are done, with the basic configuration.
Other, optional options
Setting logs channel
To set a channel, where the bot will send users answers, select it in the Application Logging field and select your channel. Example:

Setting accepted/denied role
If you want to set an accepted/denied role, just select it in Accepted Role or/and Denied Role. Example:

Viewing applications
If you didn't set logs channel, to view applications, you need to use review command, to view applicants. After that use command review [aplicator ID] to view users' applications, where [aplicator ID] is one from IDs from the list.
Accepting/Denying applications
After users apply, you can accept/deny applications. To do so, you need to use commands.
accept [aplicator ID] (message) - To accept the application
deny [aplicator ID] (message) - To deny the application
[aplicator ID] is user ID to accept/deny and
(message) is the message, which will be displayed from the bot about accepting/denying the application.
Temporary note
- The new system still is under development the MCQ questions, if you want to > include the said you have to make them on the dashboard.
- Modification of other applications are not available on the dashboard. Only the very first one.
Yet another way to applications
Discortics™ Have been thinking about how to make your application setting easier. So, as we have mentioned above, there are now two ways:
the one just using the dashboard explained above and this one.
First, run:
;appset or application-settings
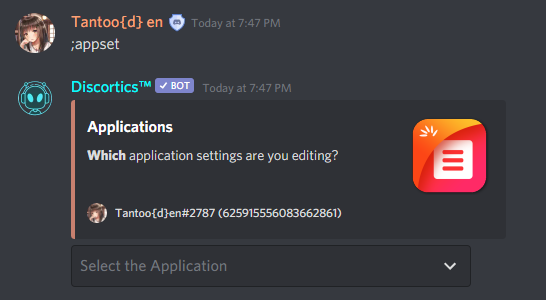
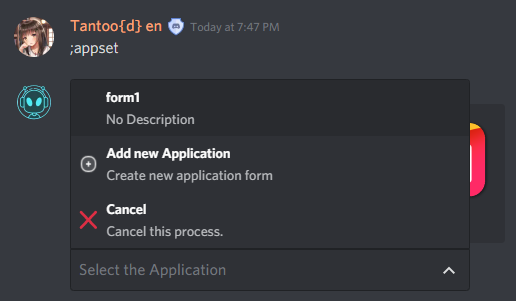
A panel will appear showing the existing and the option to create a new
form.
Once you select any of the forms, that panel will change to another
panel that might be your already done configuration or the default one, and below
you will be able to see the...bottoms!!!
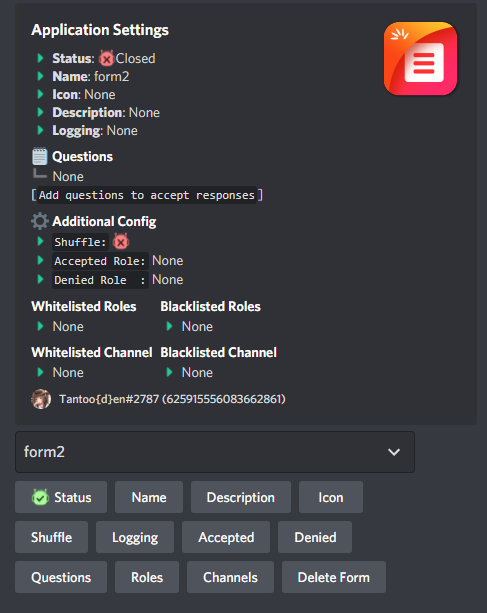
which makes it easier and quicker for your configuration.
The use of each bottom
STATUS
Is the bottom that helps you to open or close the application
NAME
Many have been asking for this! Now your application can have a unique name
DESCRIPTION
The title is obvious. Give a description or instruction of what the
application is about.
ICON
Give a unique emoji to each of your discortics™ applications, just make sure that the emoji is available on the server
SHUFFLE
Is a way to place a different order of the questions
LOGGING
Is the panel that will let you select that channel that will receive the answers
ACCEPTED
Nope, is not the bottom to accept. This bottom will let you assign the role
that will have those applications accepted.
DENIED
Same as before here you will assign the role that will keep those that have
been denied.
QUESTIONS
Here you will be able to formulate your questions, rearrange, reset and delete.
ROLES
The blacklisted and whitelisted roles to be able to participate can be
configure here.
CHANNELS
The blacklisted and whitelisted channels go here
DELETE FORM
Bye-bye form.
Now, you know, how to set up and use the application module in Discortics™ bot.
See you in the next post.